Appearance
Your first 30 minutes
School AdminYou have just signed in to SolAssists for the first time as your institution's administrator. In the next half hour you will set up one real class end to end — one division, one subject, one teacher, one student and one parent — so you can see every piece working before you do the rest of the school.
We use the demo names from this manual. Replace them with your own.
| Example | |
|---|---|
| Institution | Demo Public School |
| Academic session | 2026-27 |
| Standard / Division | Grade 8 / 8-A |
| Subject | Mathematics (code MATHEMATICS) |
| Teacher | Anita Rao |
| Student | Rohan Mehta, admission no. DPS-2026-001 |
| Parent | Sunita Mehta |
Before you start
You need the Institution Admin invitation from SOL, already accepted. If not, see First login. Have the teacher's and the parent's email addresses ready.
Minutes 0–5 · Look around
- Sign in. You land on the Dashboard: "Hello, your name" — "Here's your institution at a glance."
- Check the strip under the heading: your institution, Your role (School Admin) and Your scope (Institution-wide).
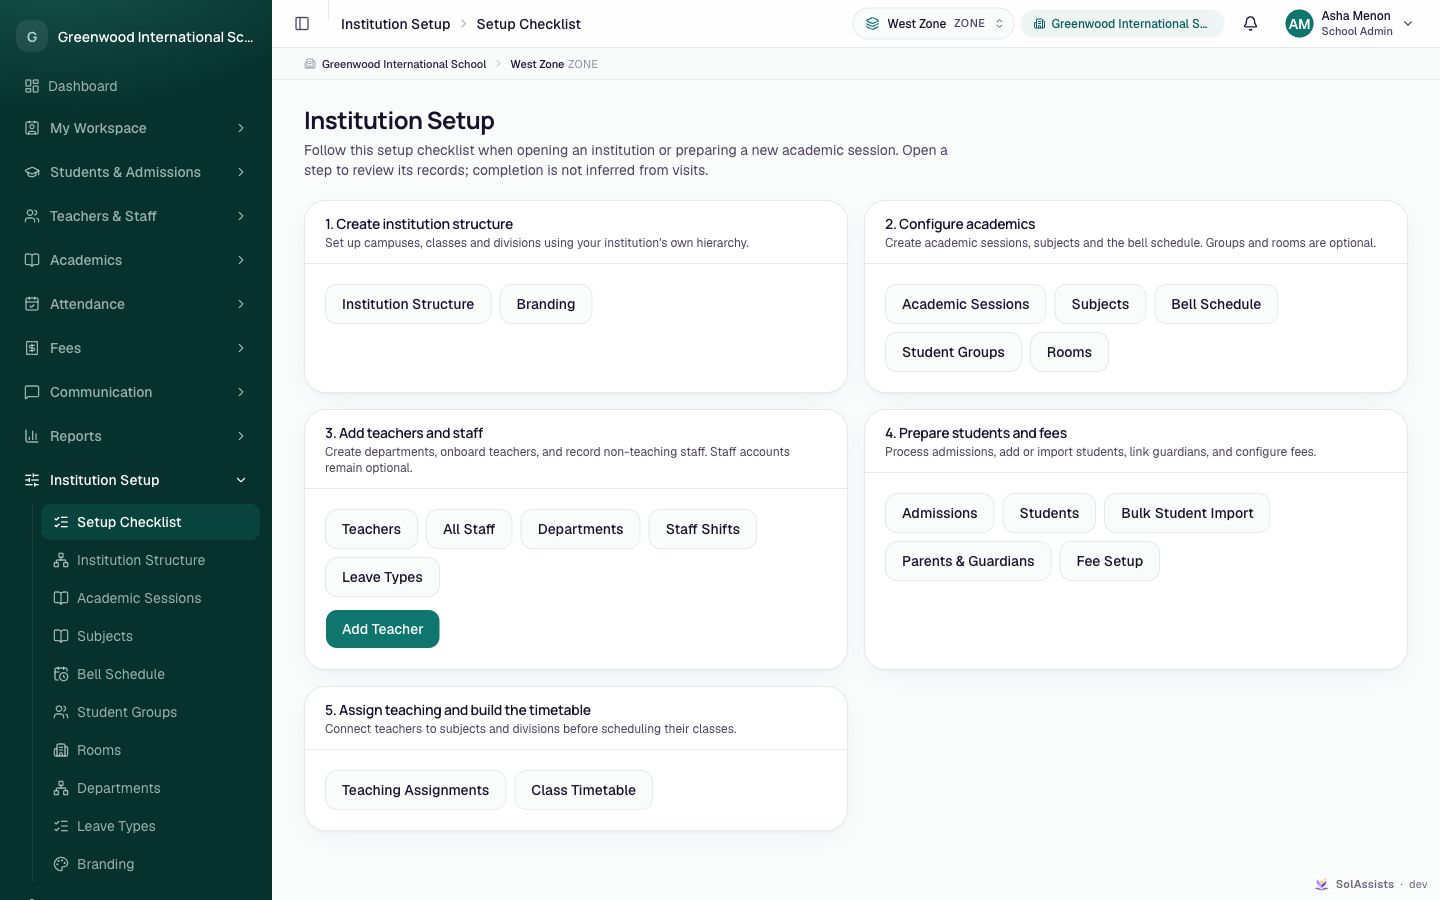
- Open the sidebar group Institution Setup → Setup Checklist. Keep this page open in a tab — it links to every setup screen in order. It does not tick steps off for you.
Minutes 5–10 · One division
- Institution Setup → Institution Structure.
- Look at the Levels card. If your institution has no zones, and a Zone level is shown, stop and ask SOL to correct the ladder before adding units — level types freeze once units exist.
- Add units from the top down: your campus (for example Main Campus), then Grade 8 under it, then 8-A under that. Give each a code, for example
MAIN,GRADE_8andG8_A. Codes use capital letters, digits and underscores, and must start with a letter —8Ais refused.
Details: Institution structure.
Minutes 10–15 · Session, periods and a subject
- Institution Setup → Academic Sessions. Confirm 2026-27 is marked current and the dates are right.
- Institution Setup → Bell Schedule. Add your first periods (for example Period 1, 08:00–08:45).
- Institution Setup → Subjects. Add Mathematics with code
MATHEMATICS.
Details: Academic sessions, Bell schedule, Subjects.
Minutes 15–20 · One teacher
- Teachers & Staff → Teachers → Add Teacher.
- Step 1: enter Anita's email, choose the Teacher role (the school's own role — not one marked "built-in"), and the campus she works at.
- Copy the invitation link that is shown once, and send it to her.
- Skip the staff record for now.
- Assign Mathematics in 8-A.
Details: Add a teacher.
Minutes 20–25 · One student
- Students & Admissions → Students → Add student. Enter Rohan Mehta, admission number
DPS-2026-001. - Enrol him in 8-A for the current session.
Details: Add a student.
Minutes 25–30 · One parent
- Students & Admissions → Parents & Guardians. Add Sunita Mehta with her email, or open the guardian added with Rohan.
- Link her to Rohan.
- Click Give access, confirm, and copy the invitation link.
Details: Parent onboarding.
If Give access is missing
Your institution does not have the People Directory module, which parent sign-ins need. Ask SOL to add it.
Check it worked
| Ask… | To confirm… |
|---|---|
| Anita, after she accepts her invitation | Mark Attendance shows 8-A with Rohan on the register |
| Sunita, after she accepts hers | Her Dashboard shows "Your children" with Rohan |
| Yourself | Academics → Class Timetable for 8-A lets you place Mathematics with Anita in Period 1 |
If Anita sees no classes, the usual reasons are: no current session, no teaching assignment, or 8-A is outside the campus you gave her. See Permission problems.
Next
Do the rest of the school in the same order using Set up your institution, and tick things off on the Onboarding checklist.